
OpenCV is the huge and open-source library for image processing, machine learning and computer vision. It is also playing an important role in real-time operation. With the help of the OpenCV library, we can easily process the images as well as videos to identify the objects, faces or even handwriting of a human present in the file. We will only focus to object detection from images using OpenCV in this tutorial. We will learn about how we can use OpenCV to do object detection from a given image using a Python program.
Object Detection
Basically, object detection is a modern computer technology that is related to image processing, deep learning and computer vision to detect the objects present in an image file. All the technologies used in the Object detection technique (as we mentioned earlier) deals with detecting instances of the object in the image or video.
Object Detection using OpenCV
We have learned about object detection in the previous section, and in this section, we will learn that how we can do object detection in an image or video using the OpenCV library. We will first import the OpenCV library in the Python program, and then we will use functions to perform object detection on an image file given to us. But, before using and importing the library functions, let’s first install the requirements for using the Object detection technique.
In this tutorial, we will use the Haar cascade technique to do object detection. Let’s learn in brief about the Haar cascade technique first.
Haar cascade:
Basically, the Haar cascade technique is an approach based on machine learning where we use a lot of positive and negative images to train the classifier to classify between the images. Haar cascade classifiers are considered as the effective way to do object detection with the OpenCV library. Now, let’s understand the concept of positive and negative images that we have discussed earlier:
- Positive images: These are the images that contain the objects which we want to be identified from the classifier.
- Negative Images: These are the images that do not contain any object that we want to be detected by the classifier, and these can be images of everything else.
Requirements for object detection with Python OpenCV:
We have to install first some important libraries in our system as it is an important requirement for doing object detection tasks. We have to install the following libraries into our system as the requirement for performing object detection:
1. Installation of OpenCV library:
First and foremost, the requirement to perform object detection using the OpenCV library is that the OpenCV library should be present in our device so that we can import it into a Python program and use its object detection functions. If this library is not present in our system, we can use the following command in our command prompt terminal to install it:
pip install opencv-python
When we press the enter key after writing this command in the terminal, the pip installer in the command prompt will start installing the OpenCV library into our system.
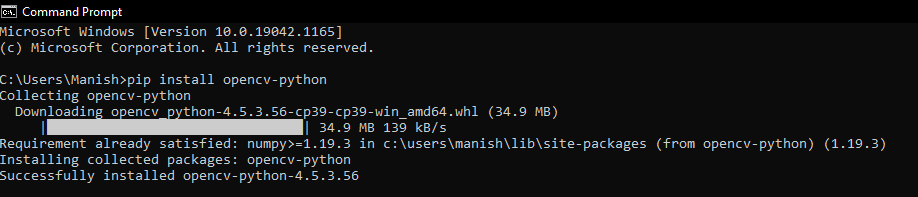
As we can see that, the OpenCV library is successfully installed in our system, and now we can import it into a Python program to use its functions.
2. Installation of matplotlib library:
Matplotlib is very helpful in the opening, closing, reading etc., images in a Python program, and that’s why the installation of this library for object detection becomes an important requirement. If the matplotlib library is not present in our system, we have to use the following command in our command prompt terminal to install it:
pip install matplotlib

When we press the enter key after writing this command in the terminal, the pip installer in the command prompt will start installing it into our system.

As we can see that, the matplotlib library is successfully installed in our system, and now we can import it into a Python program to use its functions for opening, reading etc., images.
We have installed all the required libraries for performing object detection, and now we can move ahead with the implementation part of this task.
Implementation of Object detection in Python:
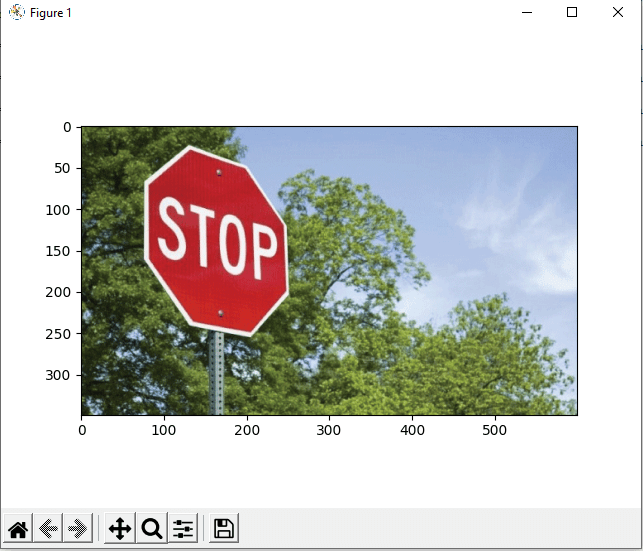
In this part, we will write the Python programs to do the object detection and understand the implementation of it. We will use the following image in our Python program to perform the object detection on it:

Opening the Image
We will first open the image given above and create the environment of the picture to show it in the output. Let’s first look at an example program to understand the implementation, and then we will look at the explanation part.
Example 1: Opening the image using OpenCV and matplotlib library in a Python program:
# Import OpenCV module

import cv2

# Import pyplot from matplotlib as pltd

from matplotlib import pyplot as pltd

# Opening the image from files

imaging = cv2.imread("opencv-od.png")

# Altering properties of image with cv2

img_gray = cv2.cvtColor(imaging, cv2.COLOR_BGR2GRAY)

imaging_rgb = cv2.cvtColor(imaging, cv2.COLOR_BGR2RGB)

# Plotting image with subplot() from plt

pltd.subplot(1, 1, 1)

# Displaying image in the output

pltd.imshow(imaging_rgb)

pltd.show()
Output:
Explanation:
First, we have imported the OpenCV (as cv2) and matplotlib (as plt) libraries into the program to use their functions in the code. After that, we have opened the image file using the imread() function of cv2.
Then, we have defined the properties for the image we opened in the program using the cv2 functions. Then, we subplot the image using the subplot() function of plt and giving parameters in it. In last, we have used the imshow() and show() function of the plt module to show the image in the output.
As we can see in the output, the image is displayed as a result of the program, and its borders have been sub-plotted.
Recognition or object detection in the image
Now, we will use the detectMultiScale() in the program to detect the object present in the image. Following is the syntax for using detectMultiScale() function in the code:
found = xml_data.detectMultiScale(img_gray,

minSize = (30, 30))
We will use a condition statement with this function in the program to check if any object from the image is detected or not and highlight the detected part. Let’s understand the implementation of object detection in the image through an example program.
Example 2: Object detection in the image using the detectMultiScale() in the following Python program:
# Import OpenCV module

import cv2

# Import pyplot from matplotlib as plt

from matplotlib import pyplot as pltd

# Opening the image from files

imaging = cv2.imread("opencv-od.png")

# Altering properties of image with cv2

imaging_gray = cv2.cvtColor(imaging, cv2.COLOR_BGR2GRAY)

imaging_rgb = cv2.cvtColor(imaging, cv2.COLOR_BGR2RGB)

# Importing Haar cascade classifier xml data

xml_data = cv2.CascadeClassifier('XML-data.xml')

# Detecting object in the image with Haar cascade classifier

detecting = xml_data.detectMultiScale(imaging_gray,

minSize = (30, 30))

# Amount of object detected

amountDetecting = len(detecting)

# Using if condition to highlight the object detected

if amountDetecting != 0:

for (a, b, width, height) in detecting:

cv2.rectangle(imaging_rgb, (a, b), # Highlighting detected object with rectangle

(a + height, b + width),

(0, 275, 0), 9)

# Plotting image with subplot() from plt

pltd.subplot(1, 1, 1)

# Displaying image in the output

pltd.imshow(imaging_rgb)

pltd.show()
Output:
Explanation:
After opening the image in the program, we have imported the cascade classifier XML file into the program. Then, we used the detectMultiScale() function with the imported cascade file to detect the object present in the image or not.
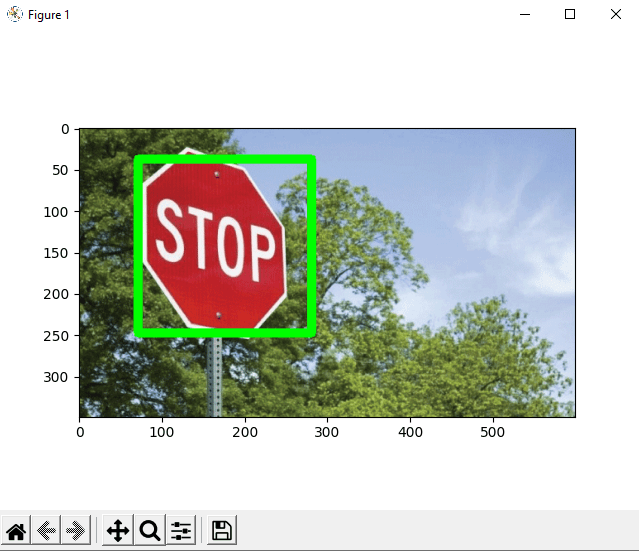
We used if condition in the program to check that object is detected or not, and if the object is detected, we have highlighted the detected object part using for loop with cv2 functions. After highlighting the detected object part in the image, we have displayed the processed image using the plt show() and imshow() function.
As we can see in the output, the image with the object detected part as highlighted is shown to us when we run the program.
Leave a Reply